

If you are planning on swapping out any of the lights in your car with aftermarket lights, there are a few different ways to handle these installations. You may be asking yourself if this is a simple DIY task, or if its something you should leave to the professionals. I’ll break down everything you need to know about adding aftermarket lights.
What are the different ways to add aftermarket lights? The process for adding aftermarket lights will vary slightly based on your truck models and which lights you plan on replacing. Either way, they can all be do-it-yourself (DIY) projects. You can add lights by using lighting kits or LED rolls which can be connected to a power source in your pickup truck.
There are plenty of reasons why you may be wanting to replace any of these lights. Adding aftermarket lights can be an easy project that will save you labor costs from having them installed by your local shop or dealership.
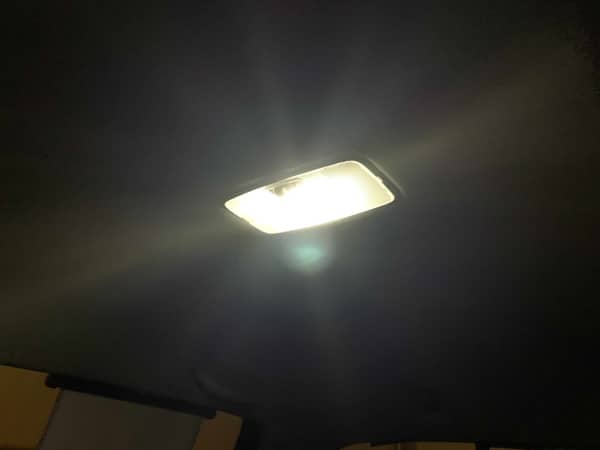
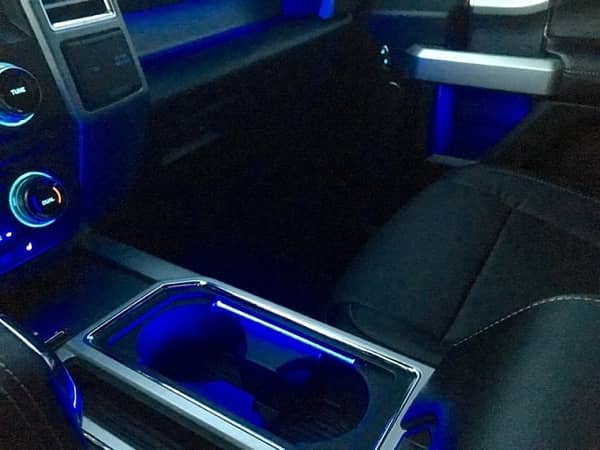
Adding LED Interior Lights
Interior LED lights have become an increasingly popular trend among truck enthusiasts looking to give the inside of their ride a little extra flare. They make the inside of the vehicle pop and it is a unique look that can be customized to your style.
Safety of Interior LED Lights
Before understanding how to add these lights to your vehicle, it’s important to note that some rules go along with interior lights. There are many myths regarding the legality of having a dome light lit while driving. The truth is that in most states that is not a law. However, it is highly encouraged to keep the interior lights off while in motion.
Dome lights or interior lights can be distracting to yourself and other drivers. Furthermore, it may mean you are doing something in the cabin that would otherwise be distracting such as reading, looking for something, or eating.
On the legal side of the coin, here are some things to consider before you deck out the inside of your vehicle with LED lights:
- By adding interior lights, you are making it harder to see outside the vehicle. Always ensure you don’t go too bright, otherwise, visibility can be compromised.
- Look into state restrictions before adding any LED lights. Many states prohibit the use of flashing lights or anything red and blue that may be visible outside of the vehicle. This can be confused as an emergency or police vehicle.
Stick to lights that will not cause distractions, lack of visibility, or additional attention to your car from the outside. Lights that do any of those things will typically draw some unwanted attention from the police.
How to Add Interior LED Lights to Your Vehicle
Most lighting kits for LED interior mounting will be universal, as they were made to work with any type of vehicle. If you have an older vehicle, you may run into some technical issues with standard kits and need to look into additional extensions and workarounds.
But for the most part, LED lighting kits should work in most cars. When you’re shopping for an LED kit, you will want to consider the lighting experience you want in your car. Think about colors, brightness, and the vibe you are looking for.
You can find LED lighting kits at most major retailers that sell auto parts or electronics such as AutoZone or Best Buy.
Once you have your kit picked out, it’s always smart to double-check that it is universal or ensure that your model is one of the models it supports.
- Disconnect the battery from the negative terminal. This is an extra safety precaution that typically should not be an issue. Disconnecting the power supply is never a bad idea when doing anything with the electrical elements of your vehicle.
- Remove panels to expose the mounting location you desire. If you want to have these lights string across the bottom of your dashboard, you will be taking off the panels from the bottom and sides of your dash to expose the mounting port.
- Run the lights through the sections you would like them and use the zip ties that should come with the kit to connect the lights across the bottom of the dash.
- Once the lights are securely in place and you ensure they are not in the way of any essential functions of your vehicle, you will need to figure out what power source you’re going to use.
- You can use an expandable circuit or a cigarette lighter adapter.
- Ensure all connections are secure, additional or loose wires are tied off with zip ties, and the control box is in an easily accessible location.
- Reconnect the battery, turn the kit on and test your lights to ensure proper function.
This is an easy, DIY way to brighten up your interior with lights that are safe, legal, and add a whole lot of style to your ride. For a more in-depth description, here is a great tutorial from YouTube:
Adding LED Exterior Lights
If you’ve ever seen a car zip by you with a colorful undercarriage display, you may have wondered how they get they get that insanely cool underglow look.
Like interior LED lights, it’s always be wise to check with local regulations and laws to ensure the lighting kit you use will be legal. In most states, these are perfectly legal and are even seen by some as an additional safety element.
The underbody lights give an extra element of visibility, especially for motorcyclists at night that are needing to be ever vigilant about larger oncoming vehicles. The only laws that would prohibit the use of these lights would be if they were meant to be distracting by flashing or causing confusion if it is not an emergency vehicle.
Like interior lights, there are some simple steps to follow that will apply to most vehicles. The exterior installation will most likely require further tools than just simple zip ties.
This may or may not be a DIY job, depending on the tools you have and your knowledge of truck. However, any body shop will happily and easily be able to enhance your vehicle with exterior LED lights if you’re not confident in your own ability.
These steps will give you a general idea of how the process works:
- Disconnect the battery as a safety precaution.
- Raise the car using a jack stand if you do not have access to a lift.
- Match up and plan where you want the underbody lighting tubes or lights to go. Use a marker to mark drilling locations for where the lights will be mounted and then go in with a drill afterward to drill the holes for the brackets. For most vehicle, the best place to do this will be along the pinch weld.
- Attach mounting brackets on all locations.
- Snap the tubes or individual lights into the mounting brackets and ensure they are secured using zip ties.
- Secure all wires and lead them to your engine while ensuring they are not getting in the way of anything.
- Pull those wires up through the engine bay and look for a hole built into the firewall. You may have to drill one if your vehicle doesn’t already have one.
- Thread the wire through the hole in the firewall and into the interior of the vehicle.
- Mount the junction box in a safe, dry location where you will not have to worry about any moisture.
- Secure all wires, reconnect the battery, and connect the power wire to the proper volt source as well as connect the negative ground wire to any bare metal source or ground location.
- Connect the junction cable and control box inside the vehicle and turn on the power to test.
Here is a helpful tutorial video to accompany these steps:
For more information on ways to stay safe and legal when adding interior and exterior lights to your vehicle, Neon Laws has some great tips.
Headache Rack Lights
Many truck owners love finding ways to customize their beds and other exterior elements to bring some style and swag to the vehicle. Other times, these additional lights can be for safety purposes.
The headache rack itself, is intended to keep passengers safe inside the cabin from any cargo that may be crashing in from the bed. It only makes sense to have additional lighting on the headache rack that will help make your truck even more visible to other drivers.
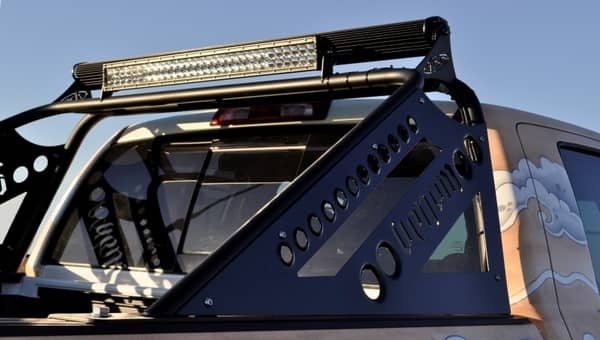
Because headache racks may fully or partially block your brake light on the back of the cab, these added aftermarket lights will help ensure your safety as well as drivers behind you.
Most trucks will have a similar process, but there may be some variations depending on the model and capabilities of the truck.
Here are some basic steps that most trucks will encounter for headache rack light installations:
- Grab the headache wire harness and feed it between the bed and the cab of your truck.
- On the bottom of your truck, unplug the seven-way trailer harness plug.
- Attach the modular wire harness to that seven-way trailer harness plug.
- Run the wire harness to the front end of the truck and attach it to the headache rack. Ensure this wire doesn’t interfere with any functionality throughout the truck.
- Secure any loose wires or tie off additional slack from the wires using zip ties.
Always test it out before hitting the road, but this should have you up and running and feeling confident that drivers behind you will see your brake lights and help keep everyone safe.
Magnum Trucks offers some additional insight on best practices for headache rack light installations.
Fog Lights
Fog lights are a great example of lighting that adds a nice aesthetic element, but is mainly meant for safety.
While fog lights get their name for the obvious help they provide in heavy fog conditions, they are also extremely beneficial for driving in heavy rainfall.
One of the most important things to remember when adding aftermarket fog lights is that they do not interfere with any signals, headlights, or anything else on the hood itself.
- There will be a harness that comes with the fog lights that you will need to run into the engine compartment.
- Connect the proper connections to the battery, which will secure a grounding point on a metal vehicle panel. You may also need to connect the appropriate connections to the passenger compartment for the fog light switch. The kit will alert you to all of these connections and where they should be located.
- Find the best mounting location for the fog light switch and ensure it is secure.
- Connect all applicable wires from the harness to the switch.
- Using a zip tie, keep all wires secure and out of the way.
It Still Runs gives a great breakdown of these steps and how to install fog lights.
Truck Bed Light
Truck bed lights are another great example of something that provides a cool aesthetic while also helping to keep you safe with added visibility for your truck. If you use your bed for a lot of supplies or tools, these bed lights help light up the cargo space so you can easily locate anything you need.

The energy source will be in the engine at the front of the truck and then wired to the bed of the truck. You can also utilize any of your fuse boxes as a source of power. In most cases, people will be using LED lights for the truck bed. They make for the easiest to install as well as a powerful illuminator for visibility.
One of the most popular ways to add truck bed lights done discreetly. You can easily hide them underneath the bed rails so it appears the lights were even built into the vehicle from the start.
Ribbon LED’s are typically preferred for these installs and using a white LED at a high wattage will help ensure you will be able to see everything you need in your truck bed even in the pitch dark.
- Make sure you have enough to go all the way around before beginning the install. Always clean the surface of the bed rails if you are using an adhesive LED roll, otherwise, the roll won’t stick properly.
- Stick the lights under the rails and give them some solid pressure to ensure they are stuck on well.
- If you have a textured bed liner, you will need to ensure it is cleaned, because the plastic won’t cling to the roll as well as painted metal. (If it still doesn’t stick use a higher bonding double-sided tape, instead of the tape that the roll comes with)
- You will take off the taillight plate so you can run the wires through and attach the switch.
- Place the switch through the hole next to the taillight.
- Connect and install all connections from the switch to the truck’s adapters.
Depending on the type of truck and the kit you have, there will be some further modifications you can make. You will need to follow any additional instructions regarding how the switch will operate with the truck and its on and off features.
Here is another helpful YouTube tutorial on adding truck bed lights:
What are Some Other Popular Lighting Attachments?
A couple of other popular lighting attachments for vehicles are for the bull bar and the grille guards. Having additional aftermarket lights on both of these attachments will be a great idea for safety and the overall look of your truck.
If you have a bull bar or grilled guard, you know they are pretty massive additions to the front of your truck and can take away from some of the other elements in the front end. Adding lights to them makes a big difference when driving in poor weather conditions or at night. You will typically find LED light kits for both attachments.
You may also find that aftermarket headlight replacements may warrant your consideration. If you don’t like the type of bulb used in the factory settings, there are plenty of options for aftermarket headlights that may do a better job in the conditions you typically drive-in. You may also simply find a type that suits you better.
LED light pods and bars are popular and easy ways to add some additional lighting to your vehicle as well. Stand-alone lights such as these can be an easier way to get some additional lighting without going through major projects to wire or add anything else.
Adding Aftermarket Lights to Your Car
Adding additional lighting to your car with aftermarket lights can be a great way to increase your safety, add to your truck’s functionality, and create a unique style to your vehicle. There are dozens of different ways to enhance the lighting in and around your vehicle that will turn heads and help keep you safe.
If you’re thinking of different ways to accessorize your truck or make it more functional, consider checking out my recommended accessories page. I spent a good amount of time picking out mods that can be useful for most pickup trucks.